halfSpinDoctor
Site Supporter
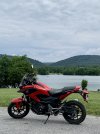
Touching up scraped shift lever with a coat of sliver metallic rust-oleum.

Follow along with the video below to see how to install our site as a web app on your home screen.

Note: This feature currently requires accessing the site using the built-in Safari browser.

Looks good Doc.
")
Not sure if it too late, but NC750 Stuff's channel on youtube shows how to remove the shock without removing the body panels. I saw it too late.Working towards fitting the YSS shock. As usual there is the bodywork removal pain to be endured
Griff owns an X-ADV. I wonder if NC750 Stuff covers three generations of NC body styles plus the Forza and X-Adv. I haven’t actually looked at the Youtube channel.Not sure if it too late, but NC750 Stuff's channel on youtube shows how to remove the shock without removing the body panels. I saw it too late.
Probably not. The publisher seems pretty bright. Considering that, I feel he would have named his channel "Three Generations of NC Body Styles Plus the Forza and X-Adv Stuff Channel." But who knows?Griff owns an X-ADV. I wonder if NC750 Stuff covers three generations of NC body styles plus the Forza and X-Adv. I haven’t actually looked at the Youtube channel.
Thanks for that. There is a Youtube channel specific to the X-Adv tho. It was helpful but still the job is a pain. If I didn't love this motorcycle as much as I do it would be gone ages ago. The more pain and suffering it causes me the more I have to keep itNot sure if it too late, but NC750 Stuff's channel on youtube shows how to remove the shock without removing the body panels. I saw it too late.
Oops. Hopefully it is set to rights soon.Folowing on on the shock replacement. Story to give y'all a laugh. Normally the whole back end should come off the bike to access the shock top bolt. However a Swedish chap on the ADV forum found a way in by only removing some bodywork and pushing some aside. It works. Got the old shock out. Got the new one in and got the bolt thru. Now the delicate bit. Fishing the nut in thru a long tunnell and getting it onto the threads, held in a socket on the end of a long section of bar. Tried once and dropped it. Found it. Tried again and dropped it. Gone !!! Nowhere to be seen. I spose I deserved a kick up my elderley backside for not jamming the nut more securely in the socket. Searched to no avail. Eventually I had to pull the shock out again. Hand up the tunnel and found an oval hole in the swingarm facing the gearbox. Checked the other side and sure enough there was a similar hole grommeted. Fingers in and there was the nut. Not easy to get out and if I was not careful it could have recessed further in. Got it anyway and got the job done. nThat added an extra hour to the job.
Not finished yet. When tightening up the bolts on the lower linkage I suddenly find that the lower shock bolt is suddenly behind the tie arm. Hmm. It hadn't been there when I took off the OEM. Only one conclusion. The new shock is shorter than the original and indeed it is by 10mm. As it had been billed on the YSS ad as a stock item replacement, it hadn't occurred to me to compare. I am now in communication with YSS about a solution. I am a big fan of YSS equipment and hopefully they will find a solution. They have responded positively so far.
Maybe I’m being a bit dense today, but it seems to me all you have to do is to move the swing arm up or down to align the bolt and make the new shock fit.Folowing on on the shock replacement. Story to give y'all a laugh. Normally the whole back end should come off the bike to access the shock top bolt. However a Swedish chap on the ADV forum found a way in by only removing some bodywork and pushing some aside. It works. Got the old shock out. Got the new one in and got the bolt thru. Now the delicate bit. Fishing the nut in thru a long tunnell and getting it onto the threads, held in a socket on the end of a long section of bar. Tried once and dropped it. Found it. Tried again and dropped it. Gone !!! Nowhere to be seen. I spose I deserved a kick up my elderley backside for not jamming the nut more securely in the socket. Searched to no avail. Eventually I had to pull the shock out again. Hand up the tunnel and found an oval hole in the swingarm facing the gearbox. Checked the other side and sure enough there was a similar hole grommeted. Fingers in and there was the nut. Not easy to get out and if I was not careful it could have recessed further in. Got it anyway and got the job done. nThat added an extra hour to the job.
Not finished yet. When tightening up the bolts on the lower linkage I suddenly find that the lower shock bolt is suddenly behind the tie arm. Hmm. It hadn't been there when I took off the OEM. Only one conclusion. The new shock is shorter than the original and indeed it is by 10mm. As it had been billed on the YSS ad as a stock item replacement, it hadn't occurred to me to compare. I am now in communication with YSS about a solution. I am a big fan of YSS equipment and hopefully they will find a solution. They have responded positively so far.
That is awesome!!! I don't have the cajones to try that.Got tired of the factory seat, so I did a DIY seat cover with some leather and a little extra foam for comfort.
I'd probably need a ladder to get on that seat.Got tired of the factory seat, so I did a DIY seat cover with some leather and a little extra foam for comfort.
Maybe I’m being a bit dense today, but it seems to me all you have to do is to move the swing arm up or down to align the bolt and make the new shock fit.