• A few people have been scammed on the site, Only use paypal to pay for items for sale by other members. If they will not use paypal, its likely a scam NEVER SEND E-TRANSFERS OF ANY KIND.

My Farkling Saga

draco_1967

Site Supporter
Joined
Aug 24, 2012
Messages
495
Reaction score
0
Points
0
Location
Utah
Visit site
Hi. My name is Trevor, and I have a farkle addiction...

I have been slowly collecting parts and tools to do all the little electrical and mechanical modifications that I’ve plotted over the past year. I bought my NC700X, Serenity, new in 2012 and began to slowly make changes as I needed them.


Over the last 3 years, I have added a lot of farkles:
-Honda Center Stand
-Rox 2” risers
-ProTaper SE YZ High bars
-Cycra Pro-Bend handguards
-Fuze box off of a relay to power electronics
-Oxford heated grips
-Givi top rack with the E46 case from my last bike
- This included wiring up running, brake, and turn signal LED into the box
-12v socket and dual USB port in frunk
-Home-brewed heated gear controller for Jacket and gloves
-Tool tubes mounted on the Givi rack
-VStream windshield (scored for a cheap price, but never liked how it directed the wind)

I left the stock torture device – er…seat – alone because I wasn’t sure what I wanted to do with it. That was added to my list of “to farkle” this winter. I also watched the development of CraftyCoder’s Motobrain over on ADVRider, and I ended up taking the dive and getting one to simplify my wiring needs. That turned out to be a ridiculous reason to get it :D

Here is the list of what I wanted to accomplish this winter:
-Upgrade suspension, front and rear
-Redo relay/fuse block wiring with Motobrain
-Improve wiring for heated gear (jacket/gloves/etc)
-Add wiring for Aux lights
-Auxiliary dash panel for the added controls
-New windscreen
-New seat
-Louder horn
-Actuator to pop open frunk and rear seat

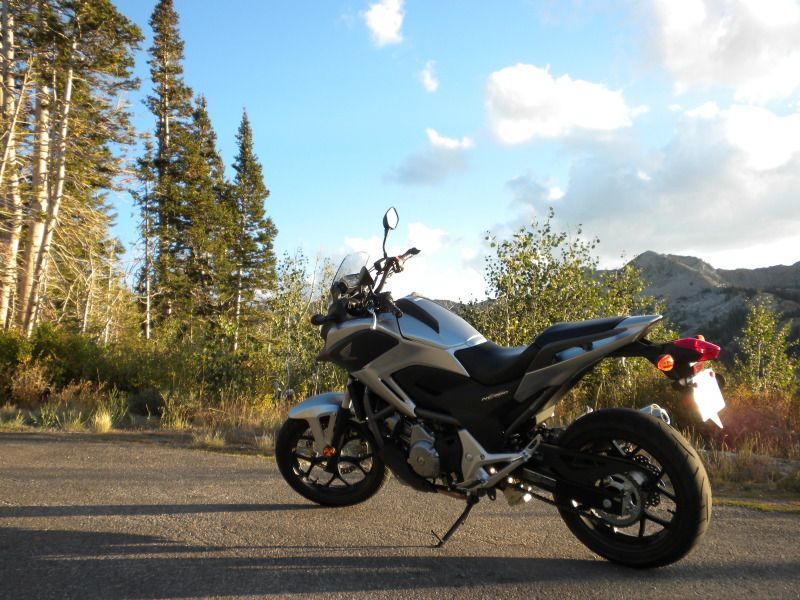
Here is where she stood before the teardown:


The following will be a short look at the last few months...
 
In order to accomplish all of this, I need a good work space. We bought our first home last year, and it came with a large garage. Unfortunately, there was no workbench and terrible lighting. I went to the toy store and got lumber and a couple LED shoplights to turn the workspace from this:


To this:


I rearranged the lighting to be a little better:

[video=youtube_share;xyRKUeX9ZW4]https://youtu.be/xyRKUeX9ZW4[/video]

Now we can get stuff done!
 
Oh man, if only I could work at that pace...It always seems like there is never enough time in the day/week/month to finish all of the projects around the house AND get in all the riding I want (or need...it's therapy, right?)
 
I stripped the bike down to bare bones. This is the most I’ve ever removed. All of the previous electrical modifications were done by removing as little as possible, over the course of a few years. That involved fishing wires through the cavities between plastics.

[video=youtube_share;eFBSYQs50II]https://youtu.be/eFBSYQs50II[/video]


I had been doodling at work to plan out what I needed to wire and where it needed to go.
I started by making the auxiliary dash, since much of the wiring would be going to and from there to the Motobrain to control inputs and show the status of some of the outputs. I made a template out of cardboard, then transferred it to aluminum. I don’t have a drill press, but I managed to get all but one of the holes right where I wanted them. On one hole, the bit slipped slightly, egging out the hole. I fixed it with some JB Weld.


I then painted it and installed the LEDs and momentary switches.


I decided to keep the bracket the came with the V-Stream, since it provides an excellent platform for mounting a homebrewed windscreen and dash!

I also made a small windscreen that was just large enough to cover the auxiliary dash. I really prefer little or no windscreen because I like the clean, turbulence-free air. In the winter, I have heated gear, so it isn’t as big of an issue. It turns out that this little screen puts the air right at my collar bones, wish keeps my head in clean air.

 
So far, turbo doesn't have a function, and eject will open the rear seat for fuel. I still need to figure out how to run the cable for that since that latch is a bit more complex than the frunk...

After finishing the dash, I began the wiring. I mounted the Motobrain and the actuators. Although there is plenty of space under the plastics, I had to make sure that there was ENOUGH room for all the doo-dads. There are two sets of wires running from the dash. One is for the LED indicators that will be tied into the outputs on the Motobrain. The other is for the momentary switches that will go to the inputs on the Motobrain. I have a ground bus bar behind the dash itself, so there is only one ground wire going from the dash to the main ground bus by the battery.

You can see these two sets of wires running along the fairing bracket above the horn. I have a quality crimping tool (thanks Beemerphile for the link you gave in your original farkle thread!), and connections were all shrink wrapped and wrapped in a protective sleeve where needed.

In these pictures you will see the Motobrain, a fuse block, a few different relays, and other things…The fuse block comes off of one of the Motobrain outputs, and it distributes power to the 2 dual-USB ports and the 12v plug in the frunk. The two relays down low on either side of the bike are for triggering the frunk and rear seat latches. The two uppder relays are for the dual horns.


I also wired some lighting for the frunk because it becomes a dark abyss after the sun goes down, and I can never find stuff! I can say that leaving the frunk light on will kill the battery, but I didn’t want it to be tied to a keyed power source. I probably won’t forget to turn it off again…I hope:D
 
Nice work. While you have everything gutted, you might consider the mercury switch solution to turning off your Frunk light.
 
Before I put the plastics back together, I installed the suspension parts. I decided to go with Cogent Dynamics after researching options. There are quite a few different options out there. I looked at Racetech and Andreani for the front. I know Racetech is highly regarded, but after emailing both Racetech and Cogent, Racetech’s response to look at the website turned me off. I sent the email because I HAD looked at the website and had more questions. The Andreani fully adjustable cartridge inserts looked really promising based on the cost and what they promise, but I never felt good about ordering parts from Europe and not having anything in the way of tech support. I also looked at options for the rear shock including Wilburs, Hyperpro, and Ohlins. After chatting with Todd at Cogent through email and over the phone, I felt really good about getting both the DDC fork kit and a rear shock from them. It cost me slightly less than the Andreani/Ohlins shock combo, and I knew that I had direct tech support. I also liked that I wouldn’t have to drill holes in the damping rod (Racetech) or modify the fork stanchions (Andreani).


Because why not?


The install was pretty straightforward. I did a dry run as recommended, and then put it all together. I checked and lubed the shock linkage bearings while I was in there.

I added a little mud flap to keep spray off the shock, but I also invested in an R&G Shocktube. I turned the Shocktube inside out, because I didn't like the bright red and white logo. After spending almost $700 on a shock, $35 seemed like a good deal for some extra protection.

I didn't take many pictures during the install, mostly because it was a dirty job, and I didn't want to get my phone all greasy :eek:
 
So how hard, really, is it to get the plastics off and, more importantly, back on? In a moment of poor judgement a couple years ago, I decided to allow someone to take my NC for a small ride. It came back with road rash all on the left side. I'd like to replace some of the majorly damaged plastics, but I'm concerned about some of the horror stories I've heard. TY.
 
So how hard, really, is it to get the plastics off and, more importantly, back on? In a moment of poor judgement a couple years ago, I decided to allow someone to take my NC for a small ride. It came back with road rash all on the left side. I'd like to replace some of the majorly damaged plastics, but I'm concerned about some of the horror stories I've heard. TY.

Getting the plastics off takes some time due the interlocking nature and the number of fasteners, but it's not a horror story. I'd strongly suggest having the service manual for assistance because some of the clips or fasteners may not be intuitive or are hidden. Also you must carefully organize the removed fasteners in order to ensure they are put back properly.
 
Back
Top