Lord la la
New Member
So I've gone on a farkling rampage and wanted to mount up some auxiliary lights, but didn't really care for the Honda light-bar. I decided to have a crack at fabbing up my own.
I decided to use the mounting points that the Honda unit would bolt into. These are two holes on a small triangular frame plate located beneath the headlight. I wasn't entirely sure however if these would provide adequate support for the bracket and light, so I wanted to add an extra level of support.
Piece A.
This piece bolts into the above mentioned Honda frame plate beneath the headlight. It extends forward approx 3 inches and then bends sharply upwards so that it passes between the bottom of the headlight and rear edge of the front headlight snout. It then bends down/forward to rest on top of the front headlight snout.
Piece B.
Next I shaped a bar to mount the lights on. This bar attaches to the bottom of Piece A.
Both Piece A and B were made from 1/8 inch aluminum. Piece A seems sturdy enough, but Piece B needed some beefing.
Piece C.
This is a steel flat that fits beneath and supports Piece B.
Sorry I didn't label the pieces in the below pics, but I think each piece will be identifiable.
Since this is a work in progress, the pieces are loosely bolted up.
Modifications will probably occur, and suggestions are welcome.
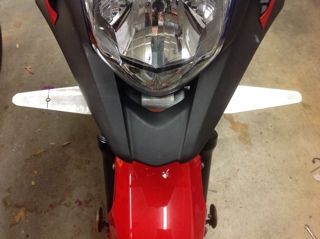
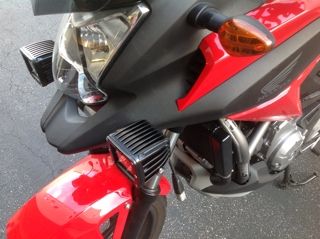
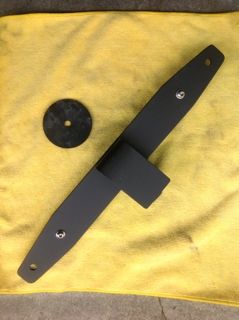
Below you can see Pieces A and B. Barely visible on A are two holes through which bolts pass and attach Piece A to the triangular frame plate.
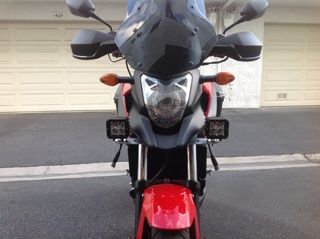
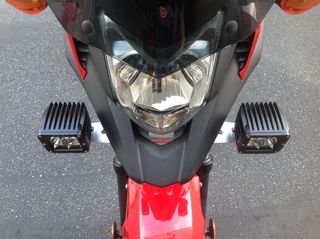
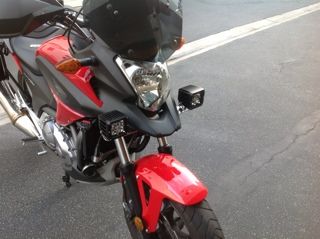
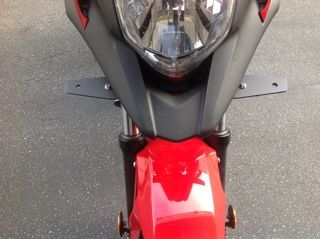
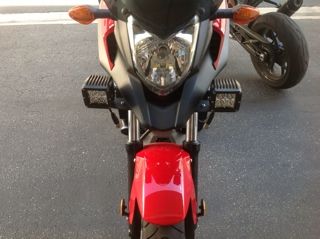
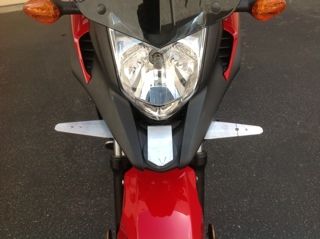
Below is the entire assembly, A,B and C loosely bolted onto the NC7. Piece B may be shortened once I select the aux lights. Of course everything will be painted or powder coated black.
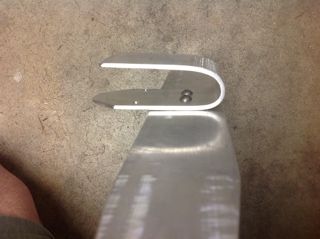
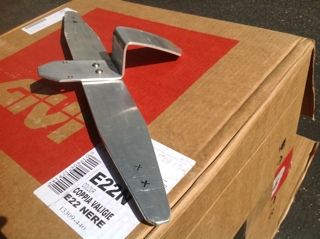
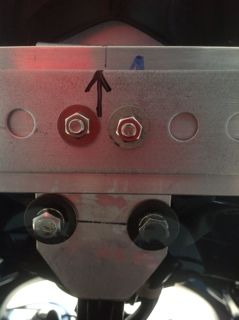
The below photo is taken facing upward. The two larger dark bolts pass through Piece A and attach it to the frame plate. The two smaller bolts pass through Piece C and B and attach them to Piece A. The arrow is pointing to the front of the bike.
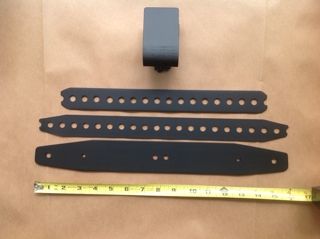
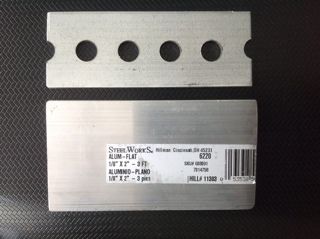
These are pieces of the materials I used.
I decided to use the mounting points that the Honda unit would bolt into. These are two holes on a small triangular frame plate located beneath the headlight. I wasn't entirely sure however if these would provide adequate support for the bracket and light, so I wanted to add an extra level of support.
Piece A.
This piece bolts into the above mentioned Honda frame plate beneath the headlight. It extends forward approx 3 inches and then bends sharply upwards so that it passes between the bottom of the headlight and rear edge of the front headlight snout. It then bends down/forward to rest on top of the front headlight snout.
Piece B.
Next I shaped a bar to mount the lights on. This bar attaches to the bottom of Piece A.
Both Piece A and B were made from 1/8 inch aluminum. Piece A seems sturdy enough, but Piece B needed some beefing.
Piece C.
This is a steel flat that fits beneath and supports Piece B.
Sorry I didn't label the pieces in the below pics, but I think each piece will be identifiable.
Since this is a work in progress, the pieces are loosely bolted up.
Modifications will probably occur, and suggestions are welcome.
Below you can see Pieces A and B. Barely visible on A are two holes through which bolts pass and attach Piece A to the triangular frame plate.
Below is the entire assembly, A,B and C loosely bolted onto the NC7. Piece B may be shortened once I select the aux lights. Of course everything will be painted or powder coated black.
The below photo is taken facing upward. The two larger dark bolts pass through Piece A and attach it to the frame plate. The two smaller bolts pass through Piece C and B and attach them to Piece A. The arrow is pointing to the front of the bike.
These are pieces of the materials I used.