• A few people have been scammed on the site, Only use paypal to pay for items for sale by other members. If they will not use paypal, its likely a scam NEVER SEND E-TRANSFERS OF ANY KIND.

So what did you do TO your NC700 today.

Should this thread be made a Sticky?

  • Yes.

    Votes: 15 42.9%
  • No.

    Votes: 20 57.1%

  • Total voters
    35
  • Poll closed .
Status
Not open for further replies.
Agua Caliente? Palo Verde? Catalina? Hey! Is that a spanish region or what? LOL

Tucson (where I live) is about 90 miles inside the US, north from the US/Mexico border, and has always had a lot of Mexican and Indian influence. Place names, heritage, food, culture, you name it. Makes for an interesting town.
 
Getting back on to my daily 100 mile round trip commute. The MRA screen helped a lot but the shoulders still feel the wind. I got caught in Santa Fe a couple of days ago with snow coming down, luckily it had been pretty warm for the prior few days. I started out with the just my jacket, but got nervous and stopped to put on rain gear. The sleet was coming down hard enough that I had to clear my shield but once I got south of the altitude, S.F.'s at 7000 feet, it cleared. About 20 miles later, the crosswind started blasting at a sustained 30 mph. I tucked down behind the screen and it seemed to help. Looking forward to tomorrow's ride. Free parking at the work site.
 
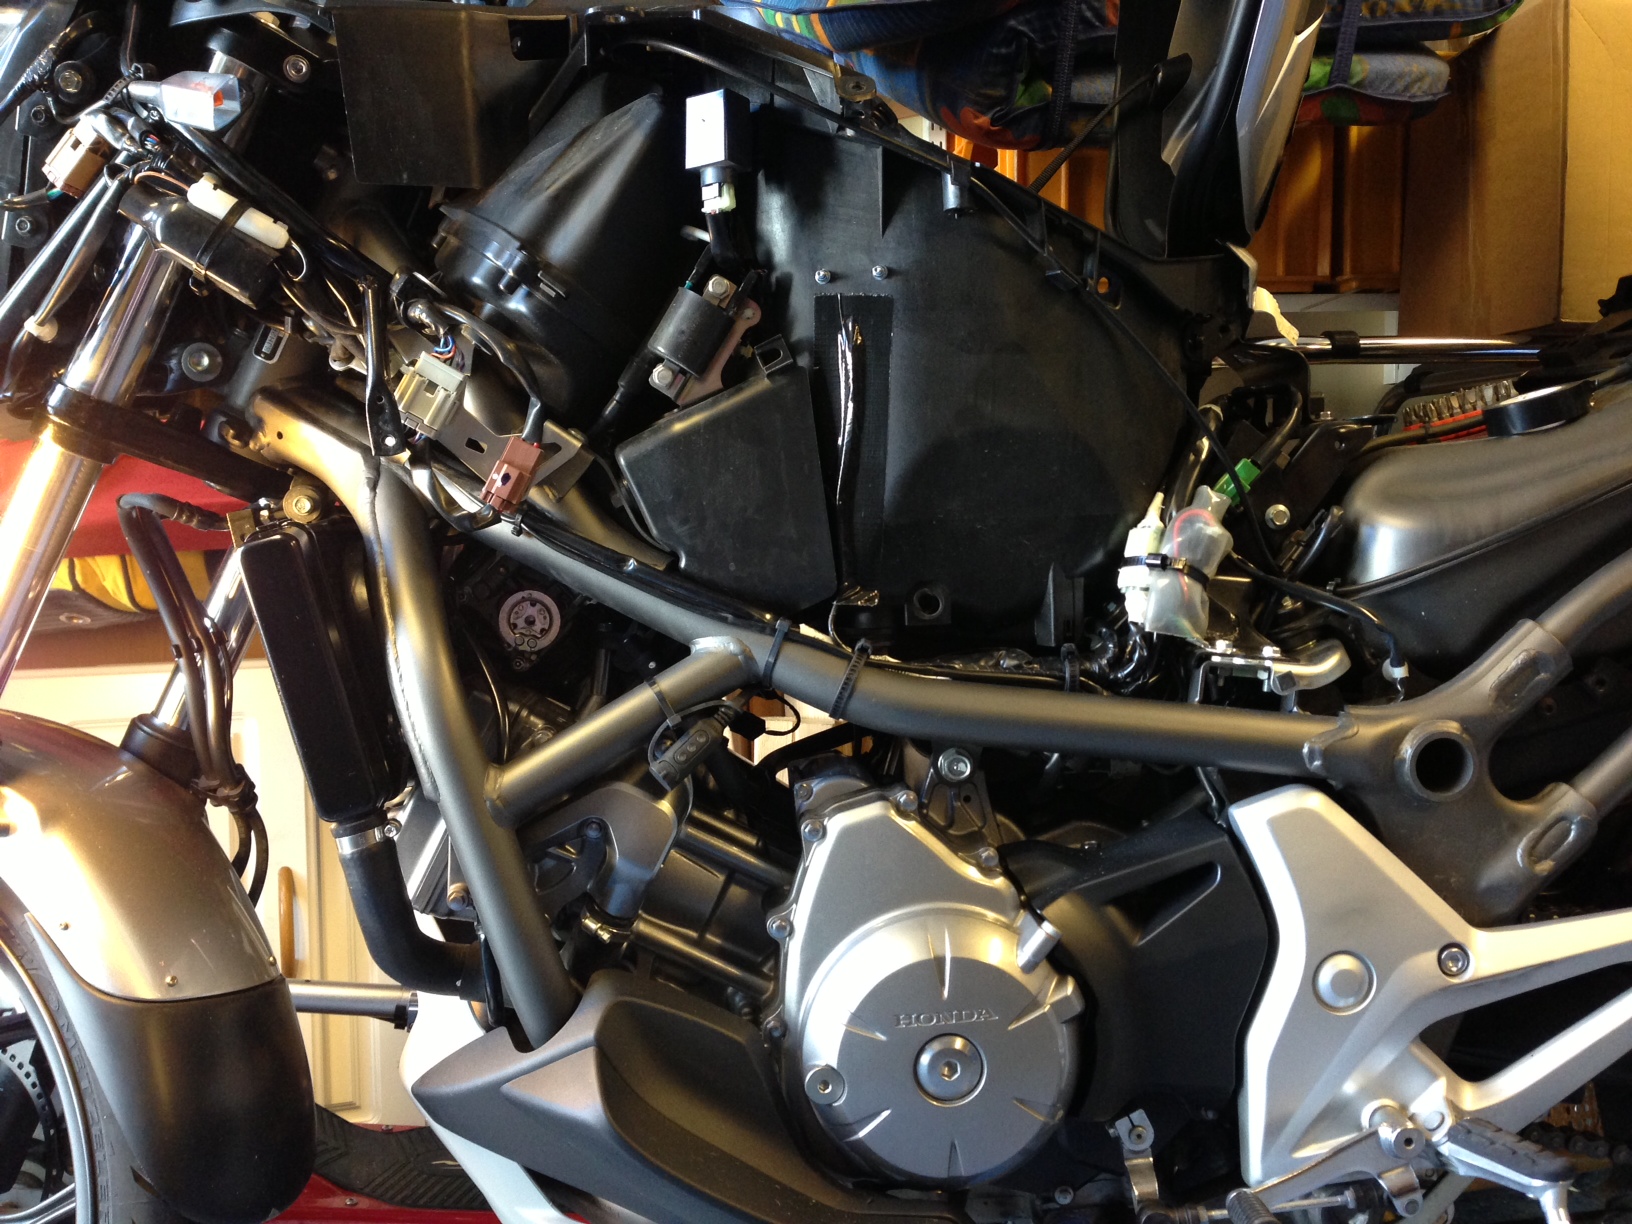
I teared down the left side of my NC700X today and mounted the power cable to my Tomtom Rider GPS unit and also a Burns Moto USB power outlet in the frunk, both connected to the Honda original cable harness that already was in place as I last year mounted the original Honda heated grips. The installations is so beautifully simple when the cable harness is there. I bought some female 110 connectors from the "Eastern Beaver", crimped and soldered the connectors to the two unit cables and just plucked them in.

In the picture below you can see the two bolts coming out of the frunk, those are for fastening the USB power outlet inside the frunk. The power cable goes below where I used black duct tape to hold it in its place. Smooth and simple. The cable harness connectors are found in the semi-transparent rubber "thingie" a few inches below the lid of the frunk.

Of course a reward was issued after the good work. That was a nice trip on the bike in the surroundings which finally seem to have entered the time of year named "spring".

NC700_sida.jpg


Addendum: I'm not responsible for all those crappy links that are added to my text. I would like to ask the Admin to take them away please. Any links added should be the choice of mine, and not something that is added without my approval!
 
Last edited:
Dropped the bike in a parking lot at 5 km/h... :)
BTW, installed the front day-lights and an add-on stoplight, put some reflective vinyls on the top box. Pics tomorrow
 
I bought the Givi PL1111 side bag mounts about a month ago.Last week I bought the 1111FZ trunk mount.Today I found some time to get both mounted on the X.
I have 2 E36 bags and a E46 top bag but I decided to make a rack instead of mounting the trunk.I need to carry a couple extra gallons of gas for our Alaska trip and did not want to mount the RotoPax high on top of the trunk so I made a rack for it.
ImageUploadedByTapatalk1366500654.814510.jpg
ImageUploadedByTapatalk1366500674.317699.jpg
ImageUploadedByTapatalk1366500901.057638.jpg

I also mounted a tool tube to carry the tire changing/repair tools.
ImageUploadedByTapatalk1366500737.578720.jpg
ImageUploadedByTapatalk1366500755.495367.jpg

I also trimmed the rack with self adhesive rubber molding.
ImageUploadedByTapatalk1366500817.817716.jpg
ImageUploadedByTapatalk1366500873.811241.jpg

The finished product..
ImageUploadedByTapatalk1366500931.175649.jpg
ImageUploadedByTapatalk1366500950.689100.jpg
ImageUploadedByTapatalk1366500973.435681.jpg


Sent from my iPhone using Tapatalk
 
Last edited:
Installed "dash board" and fog lamps.

Today I finally had some time to hang out in the garage. I built a 3.5" by 7.5" dashboard that mounts to the centre of the handlebars, put my external 12 volt socket (Marine type) and switch for fog lamps on it for now. I mounted my foglamps on my lower air deflectors, seemed like the height I wanted and out of the way. Two screws during an oil change and they are off my lower fairing. I have a Madstad adventure screen coming for the bike and intend to mount my gps on the inside of the aluminum plate that comes with that setup, seems like a good use of space.
 

Attachments

  • DSCF5515.jpg
    DSCF5515.jpg
    92.9 KB · Views: 527
  • DSCF5518.jpg
    DSCF5518.jpg
    95.2 KB · Views: 594
  • DSCF5516.jpg
    DSCF5516.jpg
    94.7 KB · Views: 537
I did my 8k Mile maintenance. Changed the oil and filter, checked/adjusted the valves, and flushed the radiator. Fairly easy process even for someone that's never worked on motorcycles before. It's fun taking your bike apart, exposing vulnerable parts of the engine, tinkering around then putting it all back together. I wasn't 100% sure how to adjust the valves, but that just ads to the enjoyment. I'm still going to take it by the shop on Monday to ask the mechanic if it sounds okay after my adjustments. All in all, a pretty good day.
 
This looks good... I guess installation was easy and not running into any problem?

I didn't time it but I would say it was less than 15 minutes with maybe an extra 5 to spray paint the bracket. The key is having Allen wrenches that are short enough to get at the front chain guard bolt without having to remove the foot peg bracket. The unit is super solid when mounted. I think what I like the most is just the way the lines flow and with the cut outs at the chain guard, it doesn't have the "fat or oversize" look of so many of the huggers I have seen. Puig engineered this one well and got it right in my humble opinion.
 
After buying my NC700X a couple of weeks ago ...

Finally got a chance to put some miles on it ...
== = = =
 
I cleaned and lube the chain. And then I took every back road, country road, and dirt road I could find between my house and Brooksville, FL. Well the dirt road part was packed limerock soften by rain. It was one of the last few good riding days we will have here in west central Florida before the temperature starts heading into the 90's. The wild flowers were blooming. The orange trees still had some bloom on them (what a sweet smell). And the blueberries I went to Brooksville to pick - like I needed the excuse to ride - were even sweeter.

5e2u4u5y.jpg
 

Attachments

  • ImageUploadedByTapatalk1366598834.537248.jpg
    ImageUploadedByTapatalk1366598834.537248.jpg
    21.9 KB · Views: 504
Rode it, actually figured out mileage for the first time. 3.78L/100km. Not bad for 300km on the bike, riding it like I want too with mixed highway and city miles. Im pleased with it anyway and imagine it will just get better.
 
Got my Omni-Cruise in the mail yesterday, so I went for a quick highway ride to check it out before the T-storms hit. It did not hold perfectly due to hills and such, but it did allow my throttle hand a much needed break. I found that I could easily make small adjustments to speed and did not need to hold constant pressure on the throttle. The Omni-Cruise is well made and looks like it will be a useful addition to my longer rides.
 
Lowered the front 15mm. Finally got around to doing this. I have been riding my girlfriends cbr250r and noticed just how easy it was to turn. By comparison my nc was slow. I knew why, just never got around to fixing the issue.

I'm lowered on lust racing lowering links (40mm). Now the NC is much easier to turn! It's no CBR, but I'm happier, and feel safer. Was worried about dodging stuff in the road, like pot holes. Now I'm Ok with the turn speed, seems back to how the bike handled when it was stock. Tomorrow is a 200 mile round trip ride to the JDM Chicago opener, and I wanted to take the bike, instead of the GS-R. It's an import of Japan, so I should be in the clear:cool:
 
nothing special...but it is my first official farkle! I installed a honda centerstand which I finally got today. I was going to joke that putting on the rubber was the hardest part, but in the end stretching that spring was more work than I thought it would be. Then I remembered the advice of a forum member who tied string to the rear wheel and the spring and pushed forward. That worked a charm.
 
Last edited:
nothing special...but it is my first official farkle! I installed a honda centerstand which I finally got today. I was going to joke that putting on the rubber was the hardest part, but in the end stretching that spring was more work than I thought it would be. Then I remembered the advice of a forum member who tied string to the rear wheel and the spring and pushed forward. That worked a charm.

Your welcome !!.HEHE


Sent from my iPhone using Tapatalk
 
It was a rainy weekend in Geneva so i ended up copying good ideas from fellow forum members in terms of modding :)

Radiator guard (home-made from aluminum wire mesh and plastic liners)
image.jpg

Then went on with simple shock protection (also home-made out of rubber car mat)
image.jpg

and finally completed power outlet challenge, together with Givi bag (no home-made things here :) )
image.jpg
 
Status
Not open for further replies.
Back
Top